Evaluation

I feel that Visual Language was a chance for me to work a lot more independently in comparison to other modules. From the start I felt quite free on what it was I could and wanted to achieve; knowing that photography was going to be what it was based upon made it slightly easier for me to become focused on my work at the start. I was excited to be getting on with a module that I could really get creative with and express in my work.

I struggled with my time management throughout the course of the module as there were a lot of inconveniences getting in the way of me keeping on track with my work. I struggled to balance my work load a long side a number of distractions. Due to housing situations I became very stressed to the point where I had had enough and the Christmas break could not have come at a better time for me. I did not work as much as I should during the break and struggled to find a good rhythm of working. In hindsight, I should have prepared myself and my work load better going in to the break so I knew what exactly I wanted to focus on in terms of my collections. After a lot of deliberation and advice, I was determined not to let the module get the better of me and tried my best to get back on track with it upon returning to Leeds. It was only really towards the end of the module that I became focused again and felt more positive about my work. I quickly began the process of testing out concepts and work, of which I consulted with peers and in critique sessions. I found this to be very helpful and it inspired my work ethic. After some trial and error, I was set in the right direction and could finally get to grips with finalizing my work.

Throughout the module I changed my idea a few times. It took me a long time to get to a concept I was happy with and felt confident in pursuing. If I had come to the conclusion of what I was going to focus on sooner, I think the module would have run a lot more smoothly for me. I felt a lot more comfortable going in to this module following on from Commtech 2 as throughout that module I found an area of work I enjoy working in, which is photography. Knowing what medium I was going to be working in made it much easier for me.

I really enjoyed being able to practice my photography independently and creatively. I enjoy the process around photography and I can draw a lot more confidence following this module having practised it on my own. I now feel I have the ability and ambition to use my constantly growing skills in the Live Projects module which is coming up.

My Postcard

Here is my postcard I am going to submit for the exhibition, it will be printed three times. It is a picture I took from the o2 academy in Leeds whilst photographing for the band 'The Pigeon Detectives'.

My Exhibition Piece

Here is my exhibition piece that I am submitting. It came from the range of photo's that didn't go in my book, but this was one of my favorite photographs that I took.

Making My Final Book

Constantina Book

I decided to make a constantina book for my photographs to be displayed in. I like this style of book as not only can you flick through it to see the images, but you can also stand it up and open the book to display all the images at once. Seeing as my outcome's are photographs, I felt this was the best way for them to be displayed. I decided that I would insert my photographs in after my book was made as I wanted them to be printed onto glossy paper for a nice finish to them.

  • Get 7 bits of paper, folding them individually in half.
  • Stack them together and mark two marks on each side of the folded paper, so there's four on one piece; this helps when it comes to gluing it. 
  • Stack them all together and put a clip on the side. 


  • Lifting up each piece of paper and where I've marked the paper for the glue, add a line of glue at the bottom and press down. Do this all the way through then flip the paper over and do the same on the other side. 

  • The put the paper in the press to help keep together. 
 
  • After the paper had been in the press for about 15 minutes it was time to move on to making the card that goes at each end of the book. I lined the paper of the book up on the card, leaving a very small edge to it.
  • I then trimmed the board down to the size I needed.
  • Once I did one board I could line the sides up to get the correct measurements for the second piece.
 
  • I then chose a piece of buckroom cloth material to cover the front and back of the book. 
  • Place the card down on the fabric and draw around it, leaving two rulers or more of a gap between the two. 

  • Then glue them down to the fabric. 
  • Once glued I turned it over and ran the bone folder along the edge of the board to get a nice fine edged finish on it. I did this for both sides. 

  • Then trim the material down until you get 2 individual boards covered with material. 
 
  • I trimmed the corners to a 45 degree angle to fold inwards when it comes to gluing. 
  • Glue the outsides one by one and fold inwards on to the board so its nice and tight to the edge. Do this all the way around and on both boards. 

 
  • Then I glued each side, top and bottom of the paper and glue it top and bottom of the boards then put the paper in between the boards so they stick together and put it back in the paper press. 
  • Once out of the press, the book has now been created. 


Final Chosen Photo's For My Book

Here are my final photo's I have decided to use in my book.


Editing My Photo's

Now I have finalized which photo's I am going to use for my book I will now need to edit them in Photoshop, This will allow me to add the finishing touches to my work.

Test Shots

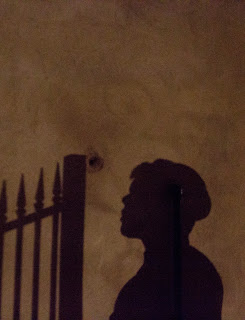
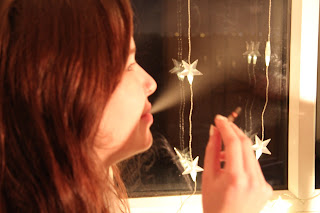
Here are just a few test shots that I have taken to have an insight to what sort of outcomes I will produce. This has made me realize how much i need to be thinking about in terms of set up and in case anything goes wrong. I understand I need to be aware of: looking at different lighting, that of the subject and of the smoke in some cases. I need to think about layout, framing, where the lights coming from, whether the shot will be a close up or a long shot. Do i need someone to operate some lighting for me? All of these things need to be taken in to consideration before taking a photograph. I also need to think ahead of taking the photo in terms of when it comes to editing the photographs. If there's slight changes that need to be made then i know I can use Adobe Photoshop to edit them in.


Taking all of this into consideration I now need to go away and take a final set of photographs. I'll need to take about fifteen final outcomes for my book which I will make after.